


Red Bull's 'TRIPLE DRS' effect EXPLAINED
Former Red Bull Racing aerodynamicist Shubham Sangodkar explains the car's aero setup
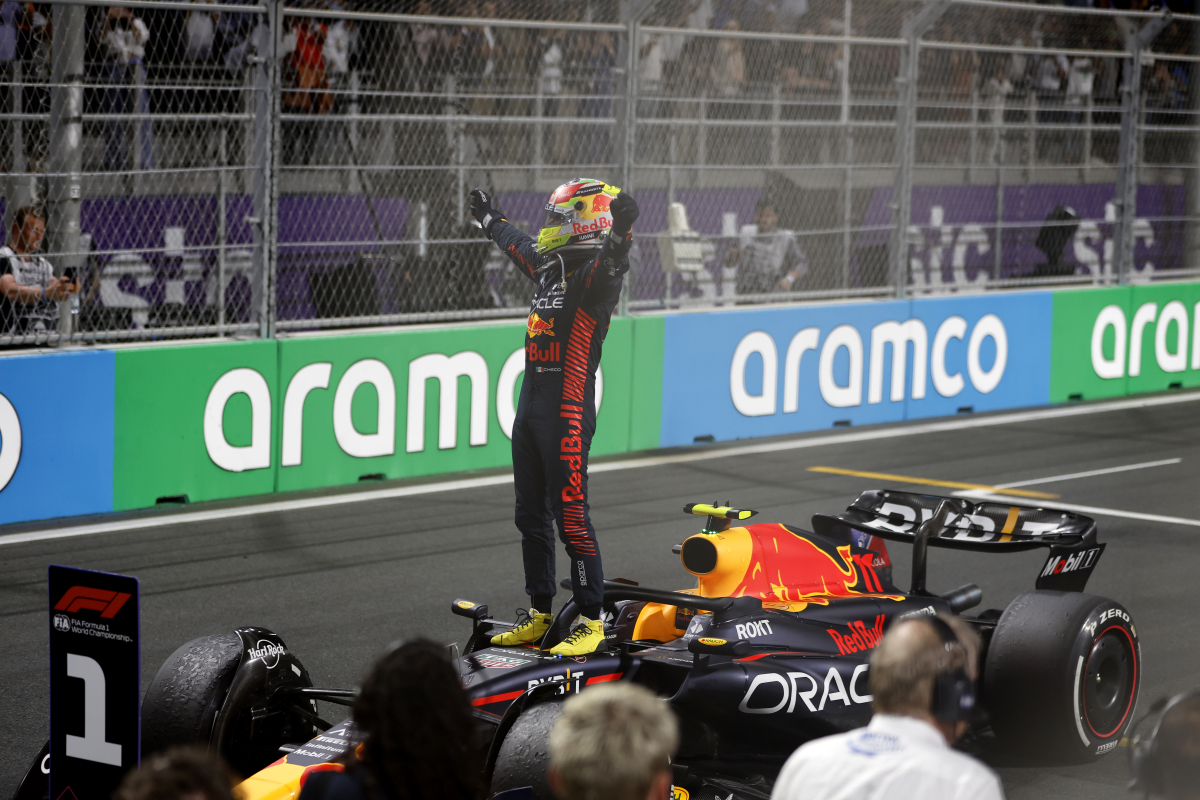
The Red Bull RB19 has been a 'jet' in a straight line this season. Its competitors have been sitting ducks on straights, as Lewis Hamilton found out in the Saudi and Australian Grands Prix this year.
Telemetry showed a speed advantage of 35km/h at the Saudi Grand Prix, compared to the traditional 20km/h. As Lewis Hamilton put it, “I don’t know why or how, but he came past me with serious speed."
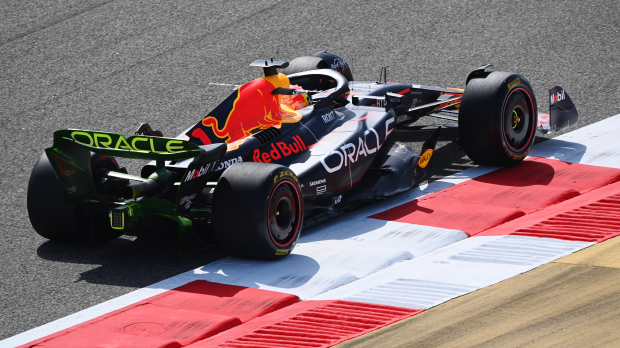
This is not just down to engine performance, unlike Mercedes in the turbo hybrid era from 2014-2021. Red Bull’s straight-line speed has a lot to do with their aerodynamic philosophy and how that has enabled them to obtain very high aero efficiency. Let's into how the rear half of the car works, and answer whether there is any truth in the 'Triple DR'” rumour that has been circling around lately using CFD models.
Understanding the aerodynamic effects of DRS and the beam wing
The rear half of the car – which in our discussion involves primarily the rear wing, the beam wing, and the diffuser – works together to generate rear downforce. They are not dependent on each other but are complementary to each other.
For example, the beam wing allows more vertical expansion from the diffuser, without actually increasing the size of the diffuser (which itself is limited by regulations) due to its upwashing characteristics. However, both of these parts can perfectly work in unison by themselves.
The rear half of the car, which also includes the rear tyres, contributes the highest percentage to the total amount of drag that is generated by the car. In simple words, if you want to make your car efficient, this is where you can make the most gains. This is why teams come up with a rear wing and beam wing package at tracks where speed sensitivity is high (e.g. Saudi, Monza).
Within the rear part of the car, the biggest contributors to drag are the rear wheels, the rear wing and the beam wing. The rear wheel drag is classified as pressure drag (the difference in pressure between the front and rear surface of the tyres) while the rear wing and beam wing mostly account for induced drag (i.e drag produced due to downforce itself). The floor is the most efficient part of the car, so there is not much to gain here in terms of drag reduction.
As we dive into the discussion of what the possible aero mechanisms at play could be, let us focus on the rear wing and beam wing and the interaction between them.
From my aero experience, I believe that the only possible way to stall the beam wing using the DRS would be to use a cranked version of a single-element beam wing, similar to Red Bull in Saudi and thus the CFD model uses exactly that. We have two simulations – one with DRS on and one with DRS off. The simulation referenced is not perfect, it's an attempt to uncover potential aero-mechanisms.
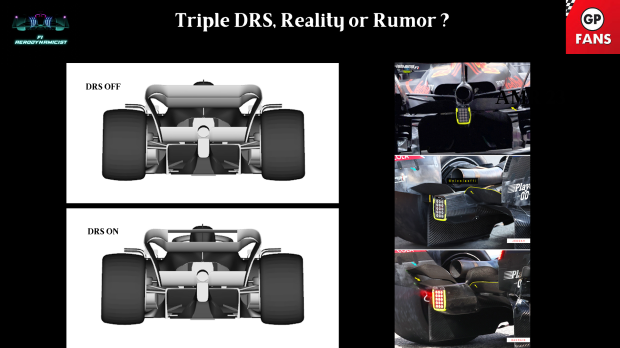
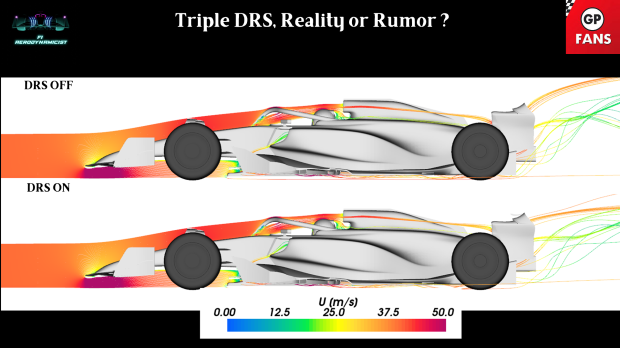
How does the DRS flap on/off change the flowfield near the rear wing?
When the DRS is on, i.e the rear wing flap opens up, there are two effects. First, the rear wing flap produces very little downforce and in turn, stops complimenting the rear wing mainplane in downforce generation. This reduction in downforce results in a decrease in induced drag.
Secondly, because the flap opens up, it reduces pressure drag – i.e. the physical resistance due to the flap itself – as a result of its area. Both these effects result in almost a 30% drag reduction with regard to drag produced by the rear wing, and about 15% drag reduction of the overall car (other effects included).
What is clear from the simulations and even a decent aerodynamic background is that an efficient rear wing mainplane cannot be stalled directly using the DRS, as activating the DRS only reduces the load on the rear wing mainplane, which would further enhance flow attachment.
Hence the reduction in drag comes from induced drag, i.e. due to decreased downforce. In the figure below you can see the change in upwash with DRS on and off.
How does the DRS flap on/off change the flowfield to the beam wing?
Understanding this requires a bit of knowledge of aerodynamics, but I’ll try my best to explain. The amount of downforce the wing produces depends on its absolute angle of attack (AoA), as shown in the image. The more the AoA, the higher the downforce until a limit which we call ‘stall’ where the flow separates. For a 3D wing, this stall angle changes across its span, due to geometry and aerodynamic details.
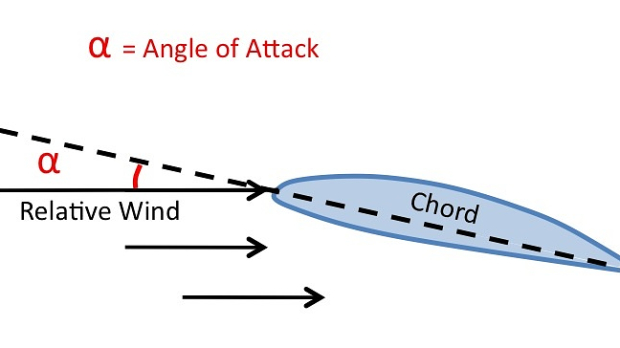
So if want to try and stall the beam wing using the DRS, we must establish a mechanism by which we can increase the AoA of the beam wing so as to push it into its stall region.
The opening of the DRS does exactly this, because of the reduction in upwash (which can be seen in the previous image), the relative AoA with DRS on that the beam wing experiences is higher, and thus its AoA increases throughout the wingspan.
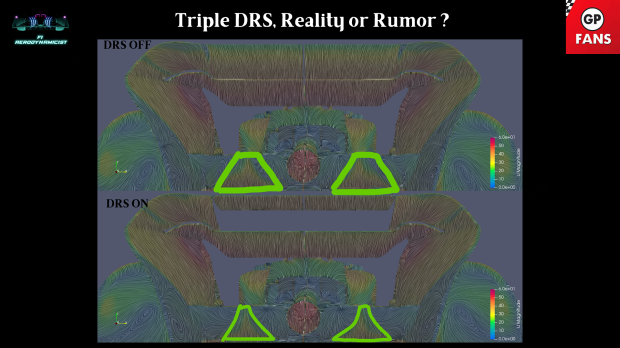
This results in increased loading on the beam wing which can ‘possibly’ push it into a stall. Usually a double-element beam wing would be able to manage this quite easily, but an extremely cranked single-element beam wing might just give up, as can be seen in our simulation.
The beam wing in our simulation is not optimised to the flow, and we have intentionally cranked it to a high AoA. The highlighted green region shows the attached flow region of the beam wing with DRS on/off. As can be seen, there are hints that this might be possible with careful design considerations and some brilliant aerodynamicists.
The image below shows a cut slice of a specific Y section with flow lines with DRS off/on. Again, if we notice the red circled area, we can see the increase in the amount of separation in the DRS on case. For those aero geeks among you, you can check out the change in stagnation point and how the rear wing flap has a leading edge separation bubble, quite evident and a nice feature to observe.
Also let's be clear on another point, stalling the floor using this mechanism is a no-go. Even if this was remotely possible aerodynamically, there is nothing to be gained there in terms of lap time, but a lot to be lost in terms of rear-end stability as the car approaches the braking zone at the end of the DRS section. The diffuser has a hysteresis behaviour and takes time whenever there is a major flow state change.

The conclusion
I’m seeing this and saying: 'Triple DRS' is just a rumour, more of a media line than anything based on sound understanding. Even though there is a slight potential to stall the beam wing using the DRS, this means you have to really crank up the beam wing – which to begin with is really draggy, and something aerodynamicists call 'cheap downforce', something you would do at Monaco.
Also, in a race when you are in front, this setup will make you slower overall in race time if you can't use the DRS.
So why is it that Red Bulls are so fast? The real answer is the floor design. Last year we saw that the RB18 floor was literally an 'organic design', a piece of art. My guess is that because their floor and diffuser produce so much efficient downforce, they can run less draggy rear wings and beam wings and that’s where the secret is.
READ MORE: Christian Horner: The Red Bull giant and ‘Drive to Survive’ star
Related
More F1 news
Latest F1 news


Recommended by the editors
 Latest F1 News
Jos Verstappen blasts Ralf Schumacher over Max Verstappen Red Bull rumours
 Ferrari F1
Lewis Hamilton brought glory back to Ferrari, but Italians still want Kimi Antonelli in red
 Sky Sports F1
Lewis Hamilton made F1 great again as Sky announce spectacular viewing figures
 Ferrari F1
Charles Leclerc addresses role of Ferrari team orders in Lewis Hamilton F1 win


Races
-
 Grand Prix of Australia 2026
-
 Grand Prix of China 2026
-
 Grand Prix of Japan 2026
-
 Grand Prix of Bahrain 2026
-
 Saudi Arabian Grand Prix 2026
-
 Miami Grand Prix 2026
-
 Grand Prix du Canada 2026
-
 Grand Prix De Monaco 2026
-
 Gran Premio de Barcelona-Catalunya 2026
-
 Grand Prix of Austria 2026
-
 Grand Prix of Great Britain 2026
-
 Grand Prix of Belgium 2026
-
 Grand Prix of Hungary 2026
-
 Dutch Grand Prix 2026
-
 Grand Prix of Italy 2026
-
Gran Premio de España 2026
-
 Grand Prix of Azerbaijan 2026
-
 Grand Prix of Singapore 2026
-
Grand Prix of the United States 2026
-
 Gran Premio de la Ciudad de Mexico 2026
-
 Grande Prêmio de São Paulo 2026
-
Las Vegas Grand Prix 2026
-
 Qatar Grand Prix 2026
-
 Grand Prix of Abu Dhabi 2026
Follow us on your favorite social media channel
Editorial & corporate information
Avenue HQ
10–12 East Parade
Leeds
LS1 2BH
United Kingdom Regional correspondence
View contact page